Intro | Task | Process | Evaluation
Process
1. Downloading & Embedding YouTube Videos

As you know, accessing YouTube from a school computer can often be unreliable at best, and impossible at worst. Did you know it’s actually possible to save YouTube videos? There are three main reasons you want to do this:
- You want to be able to play the video “offline” at school
- You want to be able to save the video for future use (protection against removal from YouTube)
- You want to embed the video into a PowerPoint presentation (yes, you do!)
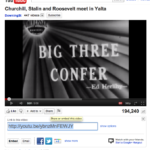
YouTube.com– The process is actually very simple. The first step, naturally, is to find the video you want to keep. Once you’re there, click the “Share” button below the video and copy the URL found in the box labeled “Link to this video”. (See Figure 1.)
[notice]FAQ: Why can’t I just copy the URL in the bar up top in my browser?
A: Most of the time, you can. But, sometimes you can get to YouTube from many different ways, and the URL up top isn’t always the same. This method using the Share button gives you the most consistent results.[/notice]
[important]If you’re having a hard time finding a good video for your historical PowerPoint, try the website, YouTube Time Machine. At this site, you can view videos according to a timeline–select the year you want, and browse through the videos for that year. [/important]

KeepVid.com – Open a new browser window, and visit Keepvid.com. In the singular text box on the site, paste the URL to the video you want to save. Hit the Return/Enter key or click the small “Download” button on the right side of the text box. (See Figure 2.) [error]CAUTION: There are often deceptive ads on this site (lots of sites, really), trying to get you to click on the wrong button. Just be observant and click the right link.[/error]
After a minute or so, your video will probably be ready for download; however, the length of the video does affect how long you will have to wait for it to be ready.
On the left side, you should see a small thumbnail of your video appear, and a bunch of links appear below it (See Figure 3.)

Click the link that says “>>Download MP4<< – (Max 480p)” (If there are several MP4 links available, usually the 480 one is quite sufficient for PowerPoints.) Your computer should then either download the video automatically, or prompt you for a saving location. If the video just opens in a browser window and starts playing, click the back button in your browser and do a right click > Save As… on that same download link. [important]NOTE: If you’re saving the video to watch on a large HDTV, you might want to save the 720 or 1080 video if your TV supports it).[/important]
http://goo.gl/EXuwA – That video is now ready to embed in your PowerPoint presentation (or watch on your computer). Follow this link to learn how to embed a video into a PowerPoint presentation (on Windows, Office 2010). (For Mac, Office 2011, visit: http://goo.gl/CSUyL.) Note: Even when “embedding” the video into your presentation, PowerPoint 2010 does not actually save your slides and the video in the same file. You will need to keep the video file and the slides file together. However, PowerPoint 2011 for Mac saves both the video and the slides in one file.
That’s all there is to it! Embed your video into your historical event PowerPoint slide and get ready for the next task! Be sure to paste the URL to your video into the presenter notes (or on the slide itself) for evaluation purposes.
Continue to Step 2 …>